


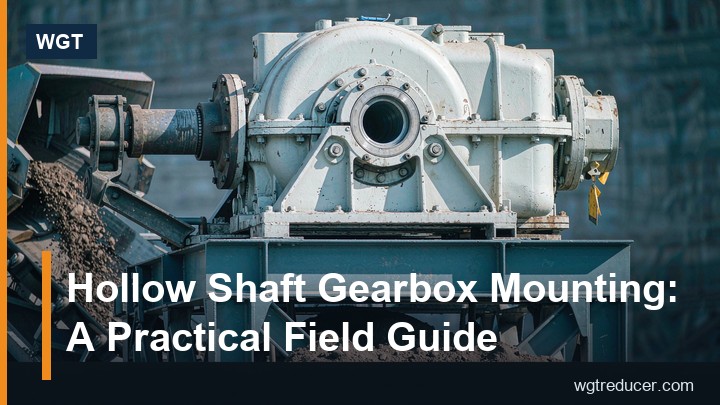
Hollow Shaft Gearbox Mounting: A Practical Field Guide
Most gearbox failures that get blamed on the gears were actually caused by the mounting. A hollow bore that rocked on a worn shaft, a torque arm bolted to sheet metal, an end plate pulling against nothing - each of those turns a perfectly good gear unit into a fatigue machine that destroys its own seals, bearings and bolts over a season. The gears rarely complain first; the interfaces do.
This guide covers hollow shaft gearbox mounting as it happens on site: how the bore and the machine shaft must fit, what the torque arm is really doing, where end plates and brake discs belong, and the short list of checks that separate an installation which lasts from one that gets revisited every quarter.
Why Shaft-Mounted Gearboxes Demand Better Fits
A footed gearbox on a bedplate is aligned by a fitter with a dial gauge. A shaft-mounted unit is aligned by the shaft itself, which means the quality of the installation equals the quality of the bore fit - there is no second chance to adjust anything. The bore is the bearing housing, the coupling and the foundation all at once.
That concentration of function is the appeal. No bedplate, no coupling alignment session, no grouting; the unit slides on and hangs. But the same design transfers every shaft defect into the gearbox: a shaft worn under the seat lets the bore rock, and a rocking bore works the bolts of the end plate loose in a pattern that looks like a fastener problem while it is really a fit problem.
The practical standard is simple. Measure the shaft at the seat with a micrometer, not with a memory. The bore is manufactured to a defined tolerance band, and the shaft must sit inside it with contact enough to carry torque through the key and the clamping - not with a clearance the eye can see.
The Bore, the Keyway and the Shaft They Sit On
Three dimensions decide whether the fit is real: shaft diameter at the seat, keyway width and depth, and the usable length of shaft the bore will occupy. All three should be measured, and all three belong in the order enquiry rather than in the installation report.
| Interface | What to check | What failure looks like later |
|---|---|---|
| Shaft diameter at the seat | Measured against the bore tolerance; wear steps, rust pits, previous set-screw marks found now | Bore rocking, end plate bolt loosening, seal weeping at the output |
| Keyway width and depth | Full length of the bore seat; burrs dressed; key material and fit | Key brinelling, torque carried on a fraction of the key, cracked hub |
| Usable shaft length | Enough for the bore plus end plate pull-up plus washer stack | End plate tightening against a shoulder or thread, false preload |
| Shaft run-out at the seat | Checked if the unit is new to an old shaft | Cyclic loads the gearbox was never rated for |
A shaft that fails two of these four checks is a candidate for renewal or sleeving, not for a bigger hammer. The cheapest moment to discover that is before the gearbox ships; the most expensive is after the crane has put it in place and the belt guard is back on.
Torque Arms: The Part Everyone Underestimates
A shaft-mounted unit will try to rotate with its shaft - that is elementary mechanics, not a defect. The torque arm is the component that refuses politely, and hollow shaft gearbox mounting succeeds or fails largely on this unglamorous bracket.
Three rules cover most sites. First, the arm must push against real structure: a welded bracket on a beam, a floor pad, a purpose-made torque plate - never sheet cladding, a handrail stanchion or a piece of angle iron chosen because it was nearby. Second, the arm's length is a design parameter: the longer the arm, the lower the reaction force, and the easier everything downstream lives. Third, the bolted joint at both ends needs to stay tight, which in practice means torque marks painted at installation and checked on the same walk as the oil level.
The load in the arm is output torque divided by arm length. On a small unit the number is friendly enough to lift with one hand - which is exactly why friendly numbers get attached to unfriendly steel. Reaction loads do not forgive thin sections; they just take longer to find them.
End Plates, Shrink Discs and Clamping Methods
The hollow bore transmits torque two ways: through the key, and through clamping. Older designs rely on the key plus an end plate that pulls the unit along the shaft; modern shaft-mounted units often use a shrink disc on a widened hub section, which clamps the shaft without a key for many ratios.
The choice has consequences on site. A keyed bore tolerates an imperfect shaft surface better but needs the keyway verified over its full length. A shrink disc needs a clean, slightly oiled shaft of the right diameter and a torque wrench on its ring bolts, tightened in the pattern printed on the disc - never in sequence around the circle. Both need the shaft end protected: an end plate pulls against a washer stack and the shaft face, and a shrink disc concentrates serious pressure where it sits.
Whichever method the unit carries, the assembly instructions are short and unforgiving. Loose clamping does not announce itself; it lets the bore micro-slip, polishes the shaft, and the first symptom is often a rusted-together assembly at the next removal. Overtightening cracks hub sections that were never designed for creative torque wrench settings.
Mounting and Demounting Without Damage
Most shaft-mounted gearboxes are installed with a pulley or sheave on the same shaft, and the classic mistake is driving the unit along the shaft with a hammer against the case. The case is a precision assembly; a hammer finds its bearings before it finds the bore.
The workable sequence is short. Support the unit's weight so the bore never carries it during fitting. Clean and lightly oil the shaft seat. Slide the unit on by hand or with a soft puller against the end plate boss, never against housing fins or covers. Fit the end plate or shrink disc and clamp to specification. Attach and load the torque arm last, after the unit sits in its final position. Demounting is the reverse, with a proper puller, and it goes faster on units where somebody recorded the installed measurements at day one.
A note worth pinning above the job: the unit that came off cleanly in year five was planned off at day one. Clearance for a puller, access to the end plate bolts, and a note in the file of the actual shaft measurement - each is a five-minute decision at installation that pays out years later.
Alignment Checks After the Unit Is On
There is no coupling to align, but there are still things to check, and they are the ones a hollow bore cannot fix by itself. The machine shaft must be straight at the seat - a sagged conveyor shaft or a bent fan shaft will destroy any bore fit over time. The unit must hang square to the load path: on conveyors, the pulley lagging and the belt tracking decide where the thrust goes, and the torque arm sees all of it.
Run the drive briefly and put a hand on the case. A smooth hum is a fit that works. A beat or a throb that comes and goes with rotation is a fit problem or a shaft problem, and it will not improve. Checking the end plate bolts and the torque arm bolts again after the first week of running closes the loop - bolted joints bed in, and the re-torque is part of the installation, not a warranty claim waiting to happen.
Common Mounting Mistakes and What They Cost
The same handful of mistakes account for most early failures on shaft-mounted units. A bore fitted over a worn seat without measurement, costing seals and end plate bolts within months. A torque arm bolted to cladding, costing a cracked foot when the sheet finally tears. A shrink disc tightened by feel, costing a hub or a seized assembly. A keyway cut short of the seat, carrying torque on half a key until the hub cracks. And the quiet one: no record of what was actually measured, so the next installer starts from zero with a shaft that has been wearing for five years.
None of these is a gearbox problem. All of them are mounting problems, and every one is cheaper to fix at installation time than at failure time. That asymmetry is the entire argument for treating hollow shaft gearbox mounting as a specification item rather than a fitter's afternoon.
For a worked example of how a right-angle hollow shaft unit is specified against a real duty - bore, torque arm, oil grade and all - see the right-angle hollow shaft gearbox page, and use the online selection tool to size the frame before the shaft is measured twice.
Frequently Asked Questions
Can I mount a hollow shaft gearbox on a worn shaft?
Only if the wear is inside the bore's tolerance band at the seat. A worn seat lets the bore rock, and the rocking destroys end plate bolts and output seals long before the gears complain. Renewing, sleeving or machining the shaft is almost always cheaper than the failure the worn seat eventually causes.
How tight should the torque arm be bolted?
Tight to a torque wrench setting, not to enthusiasm. The arm is loaded cyclically, so the bolts need correct preload, thread condition and - ideally - painted torque marks so any loosening is visible on the weekly walk. A loose torque arm turns a smooth reaction load into hammering, and hammering cracks feet.
Do I still need the key with a shrink disc mounting?
It depends on the unit design. Many shrink disc hubs transmit the full torque by clamping alone, while some designs retain the key as a backup. Follow the manufacturer's drawing for that frame - the two systems are not interchangeable, and fitting both incorrectly can distort the hub.
Why does my shaft-mounted gearbox knock when starting?
Most starting knocks trace back to the torque arm path: a loose arm bolt, a soft bracket, or a reaction point that flexes under load. The second candidate is clearance in the bore fit from a worn shaft. Both are mounting issues, and both get worse with every start until they are fixed.
Should the unit be supported while sliding it onto the shaft?
Yes - always. The bore and its bearing surfaces are not designed to carry the unit's weight edge-on while it is being worked along the shaft. A sling or a trolley under the case during fitting protects the bore, the seal land and the installer's feet in one habit.