


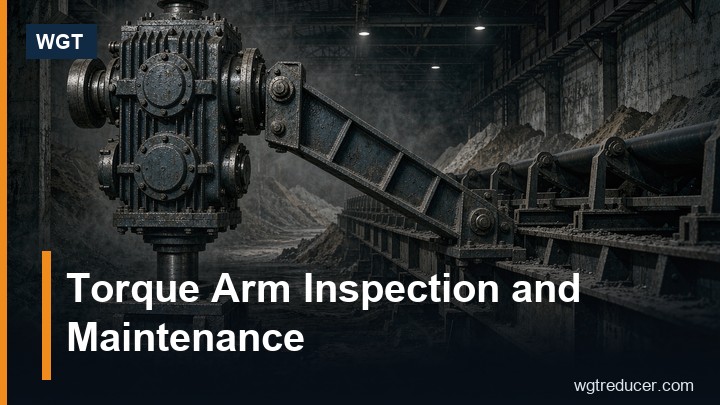
Torque Arm Inspection and Maintenance Guide | WGT
A torque arm does one job: it takes the reaction of a shaft-mounted gearbox and hands it to the structure instead of the foundations. It is also the most neglected part of the drive. The oil gets checked, the seals get glanced at, and the bracket that quietly carries the full output torque of the unit gets looked at once a year, if the plant remembers. This guide covers what the arm actually does, what wears, and the short inspection routine that keeps a shaft-mounted drive honest.
What the Torque Arm Is Really Doing
A shaft-mounted three-stage parallel shaft gearbox hangs on the driven machine's own shaft. The moment it transmits torque, the case wants to rotate with the output. Something has to stop it, and that something is the torque arm: a link from a bracket on the case to a fixed point on the machine structure, arranged so the reaction is carried in tension or compression along the arm rather than as a bending load on the case or the shaft.
The load is not small. A belt drive taking 30 kW at 30 rpm develops well over 9,000 Nm at the pulley, and the arm sees a comparable reaction moment continuously, plus every start, stall and belt-grab event the process delivers. The arm also takes a share of the belt pull on conveyor drives, because the head shaft is pulled forward by the tension and the gearbox hangs on that same shaft.
Two design details decide whether the arm serves or suffers. The first is the direction: the arm should push or pull along its own axis, at the angle the mounting drawing specifies. An arm used as a strut at the wrong angle turns its bushings into bearings and its bracket into a lever. The second is adjustability: most arms are slotted or screw-adjusted so the unit can settle and belt tension can be set without shimming the gearbox itself.
The Four Things That Wear
Bushings come first. Almost every torque arm uses rubber or polyurethane bushings at one or both ends, and they are deliberate wear parts: they absorb the small movements that metal-to-metal joints would turn into fretting and looseness. They compress over time, and as they compress the arm develops play - first a millimetre, then enough for the whole unit to knock at every start.
Bolts come second. The bracket bolts work in a vibrating, cycling load path, and a bolt that was torque-tightened at installation will relax. The pin bolts and the arm-to-structure bolts are both in that path, and neither is easy to see move because the loss of preload happens without anything visibly shifting.
The bracket itself comes third, particularly outdoors. The arm pushes on structure that may have been designed by someone who never saw the gearbox, and corrosion or a cracked weld at the anchor point quietly reduces the load path to a fraction of what the arm can deliver. Salt air and washdown environments are the usual suspects.
Alignment drift comes fourth, and it is really a symptom: as bushings wear and bolts relax, the case settles a fraction of a degree at a time. The output seal is usually the first part to complain, because it is the component most sensitive to the shaft running off its intended line.
The Inspection Routine, End to End
The whole routine takes minutes and fits into any walk-round:
| Check | What good looks like | What needs action |
|---|---|---|
| Bushings | Firm, no visible cracking, arm cannot be rocked by hand by more than a millimetre or two | Cracked, compressed, or visibly loose - replace as a pair, never singly |
| Arm pins | Seated, retaining hardware in place, no score marks from rotating in the bore | Pin spinning in the bore or fretting dust around the eye |
| Bracket bolts | Torque-marked and unturned since the last check | Any witness-mark misalignment - re-torque and investigate why |
| Anchor point | Sound welds, no corrosion bloom under the bracket, structure not flexing | Rust bleed from a weld line, fresh paint cracking at the anchor |
| Case attitude | Unit sits at the angle it was installed at, level reference unchanged | Any visible settling - the arm length or the take-up has changed |
| Belt tension | Set at the take-up, not at the arm | Arm being used as the tension adjustment |
Two of these checks deserve emphasis. The bushing test - trying to rock the unit by hand through the arm - finds play long before it becomes noise. And the torque marks on the bracket bolts cost nothing at installation: a stripe of paint across the bolt and the nut turns the next inspection into a five-second visual.
Adjustment After Belt Tensioning
The most common self-inflicted damage happens during belt maintenance. Belt tension is set at the take-up screws, the belt is run, and everything looks fine. But the head shaft position relative to the gearbox has changed by the amount the take-up moved, and the arm - which was adjusted to the old position - is now preloaded in whatever direction the shaft moved.
The correct sequence is short. Slacken the arm adjustment completely before touching the take-up. Set belt tension. Run the belt under load so the unit finds its natural settled position. Then adjust the arm to that settled position and lock it. An arm locked before the unit has settled is either preload on the bushings or preload on the shaft, and both express themselves later as wear somewhere else.
The same logic applies after a belt change, after any take-up work, and after the rare occasion when the unit itself has been removed and refitted.
The Failure Signs and What They Precede
Torque arm problems announce themselves in a predictable order. The first sign is usually noise at start: a knock or clunk as the slack in a worn bushing is taken up. That is the moment to inspect, because the next stage is movement - the case rocking through the play, working the output seal off its line and putting a cyclic load on the bore fit.
The second sign is a seal that starts to weep from the output end with no obvious cause. On a shaft-mounted unit, a leaking seal with a dry sump history is more often a mounting problem than a seal problem, and replacing the seal without fixing the arm buys only a few months.
The third sign is visible: the arm bracket bolt holes elongating, or fretting dust (a dark, fine powder) around the pin eyes. At that stage the joint is moving under load and the unit is one shift away from something more expensive.
None of these reach the catastrophic stage often, because the arm is mechanically simple and failures announce themselves. The plants that do see dramatic failures are the ones that also skipped the installation details: an arm pinned against unloaded structure that later flexes, a bracket added as an afterthought to a member that was never designed for the reaction, or an arm locked tight at commissioning and never looked at again.
Specifying the Arm at Purchase
A few lines at the enquiry stage save years of adjustment:
- State the anchor point. A photograph of the structure the arm will brace against lets the supplier confirm the bracket arrangement and the arm length.
- Ask for the arm as a sized component, not an accessory - the bushings, pins and adjustment range should match the actual reaction torque, with margin for the worst start.
- Confirm adjustability. A slotted arm or a screw adjuster, so belt tension never has to be set through the gearbox position.
- Ask what the service spares are. Bushings and pins are consumables; knowing their part numbers on day one is cheaper than identifying them from a fractured example at year four.
Units supplied as proper shaft-mounted industrial gearboxes arrive with the arm designed around the case geometry - the online selection system lists the torque-arm builds explicitly for this reason - and the spare parts conversation is worth having at the same time as the gearbox conversation.
FAQ
How often should torque arm bushings be replaced?
There is no hour-based answer; wear follows the load cycle and the starts. Inspect visually every quarter, replace when play exceeds a few millimetres at the arm or any cracking is visible. Plants with high start counts check more often - each start is a load pulse the bushing absorbs.
Can a worn bushing be replaced with a solid steel bushing?
It can be fitted, and it is a mistake. The resilient bushing is doing a job: absorbing the small relative movements between case and structure. A steel bushing turns those movements into wear at the pins, the bolt holes and the bore fit instead.
The gearbox keeps knocking at start-up. Oil and alignment check out. What next?
Check the arm. Slack in the bushings, a loose bracket or an arm that was locked against a settled position all present as start-up knock. It is the last part of the drive most people inspect and the first part to develop play.
Should the arm carry belt tension?
No. Belt tension belongs in the take-up. The arm carries the torque reaction, and using it to trim belt tension preloads the bushings and distorts the whole mounting every time the belt is adjusted.
What torque should the bracket bolts be tightened to?
The unit's mounting drawing states it, and it matters: the bolts work in a cycling load path and rely on preload. Tighten to specification, mark them, and re-check after the first week of running - bolts in any new installation relax once as everything seats.
Putting It Into the Routine
The torque arm rewards exactly one thing: being on the walk-round list. Five minutes a quarter - rock test, witness marks, anchor sight check - covers nearly everything that goes wrong with shaft-mounted drives, and none of it requires stopping the machine. Plants that adopted the habit report the same outcome: the drive is discussed at the annual review, never during the shift. If you are selecting a new shaft-mounted unit and want the mounting reviewed against your structure, send the anchor-point photos and shaft details through the enquiry and the bracket arrangement comes back with the quotation.